การติดตั้ง SSL ด้วย Let’s Encrypt ผ่าน Certbot บน Linux
และเซท Auto Recert ทุกๆ สามเดือน
Recommend: Ubuntu 22.04
- Install Package Certbot
sudo apt update
sudo apt install certbot python3-certbot-apache -y - Config Nginx
vi /etc/nginx/conf.d/<domain>.conf
เช่นvi /etc/nginx/conf.d/zealtechinter_com.conf - วางข้อความด้านล่าง (ปรับแต่ง domain / ip address / port ให้ถูกต้อง)
*********
ด้านล่าง (nginx config)
********* - กด ESC แล้วพิมพ์ !wq จากนั้นกด Enter เพื่อ Save ไฟล์
- ตรวจสอบความถูกต้องของ syntax ด้วยคำสั่ง
nginx -t - กรณีไม่มี Error ให้ Restart nginx ด้วยคำสั่ง
systemctl restart nginx - พิมพ์คำสั่ง
certbot --nginx -d <domain>
จากนั้นกรอก email และรอจนกว่า certbot จะติดตั้งเสร็จ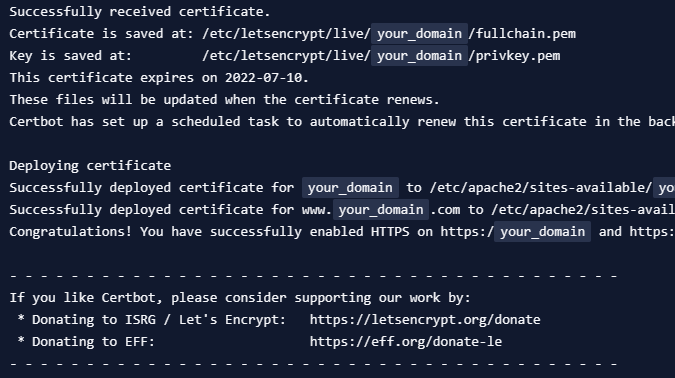
- ทดสอบหน้าเว็บ โดยเรียกผ่าน https
- เซท Crontab ให้ re-cert ทุกๆ เดือน โดยพิมพ์คำสั่ง
crontab -e
เลือก 1 (ใช้ nano editor) - พิมพ์ข้อความ
0 2 * * MON /usr/bin/certbot --nginx-ctl /usr/sbin/nginx renew >> /var/log/certbot-cron.log 2>&1
จากนั้นกด Ctl + x เพื่อ save
# nginx config
server {
    server_name <ip_address> <domain>;
    # set client body size #
    client_max_body_size 1024M;

    location / {
            proxy_pass                              http://<ip>:<port>/;
            proxy_set_header                        Host $host;
            proxy_pass_request_headers              on;
            proxy_set_header X-Real-IP              $remote_addr;
            proxy_set_header X-Forworded-For        $proxy_add_x_forwarded_for;
            proxy_set_header X-Forworded-Host       $server_name;
            proxy_set_header X-Forwarded-Proto      $scheme;
    }

    location /mnt/ {
            alias /app/mnt/;
    }
}